


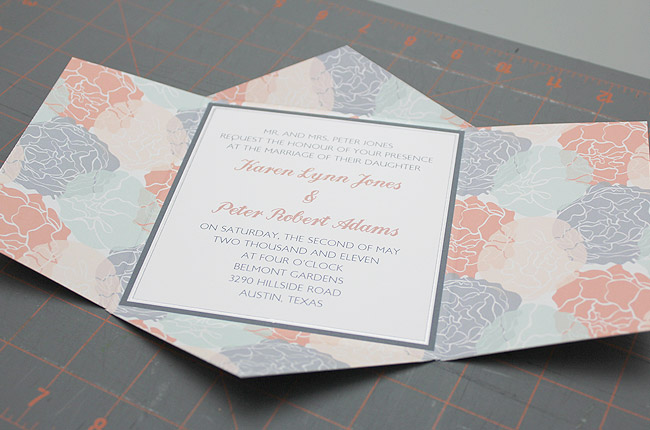
Hello everyone! I’m Anna Skye of Download & Print and I am thrilled to have Brenda invite me over to her blog with an exclusive printable wedding invitation template that I call Peachy Keen. First, if you are looking for a wedding invitation, huge congratulations on your upcoming nuptials! If you are planning a contemporary wedding but don't want to stray too far off the beaten path, this pouchette might pique your interest. The surprising color combination adds a modern spin to the classic pouchette shape.
The DIY steps are easy enough for even the most reluctant crafter to follow. Best of all, the finished product looks anything but DIY. I don't believe you have to compromise on quality or style when you choose to make it yourself.
Get the free Peachy Keen downloads here and follow along with the steps below to create this invitation for yourself.
Supplies:
- Free printable templates {DOWNLOAD HERE}
- White card stock
- Printer
- Silver ribbon 7/8” wide, cut into approximately 18” lengths
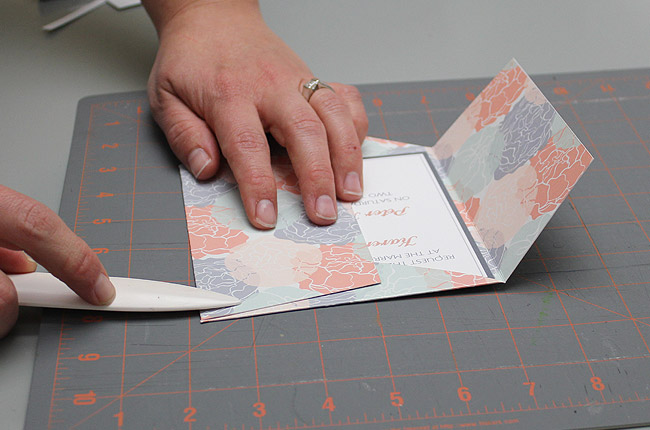
- Bone Folder (optional)
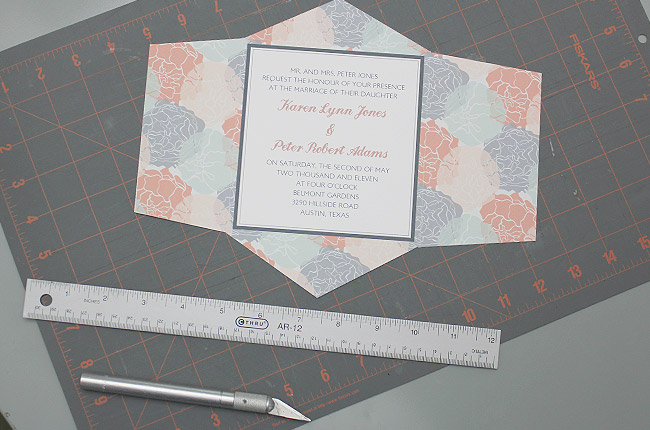
- Scissors or X-acto knife and ruler (my preference)
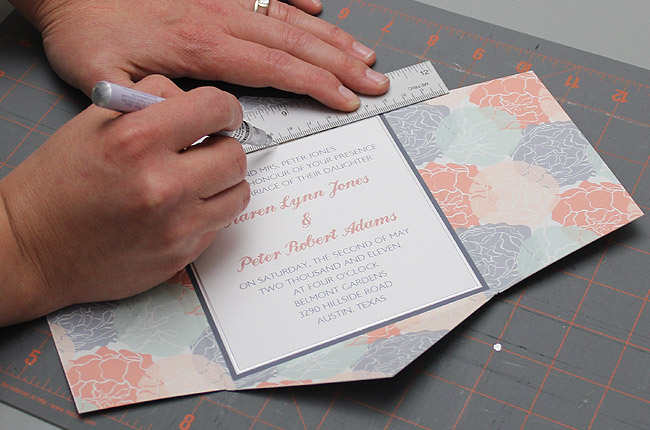
- Silver sharpie (optional)
Download the free Peachy Keen wedding invitation template files. Open the documents in MS Word and add your wedding details.
The fonts I used in the sample are London MM and Landliebe Script. You can download these fonts for free online, or use any fonts that you like. If you don’t have the sample fonts installed on your computer, Word will substitute different fonts.
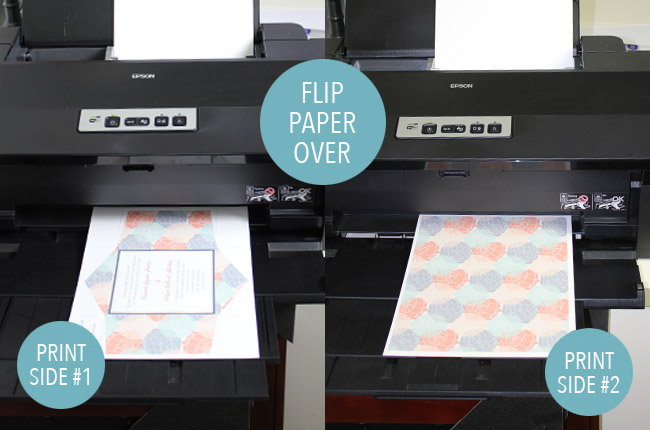
Print the first side of the pouchette, flip the paper over and print the back side.
Hint: 90 lb paper is the ideal weight for this project. A paper too light runs the risk of having the printing show through the other side. Anything too heavy and your printer may have trouble, and creating the creases becomes more work.
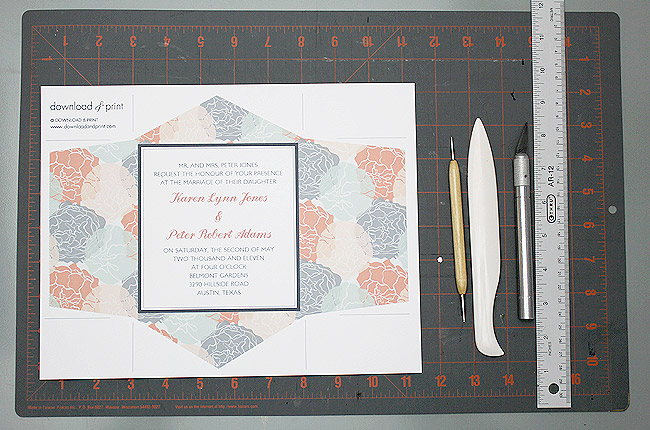
Using your bone folder, score along the fold lines, just outside the invitation square. This starts the crease and preps the paper for the steps to come.
Hint: If you don’t have a scoring tool, a closed mechanical pencil or back of your X-actor knife will work.
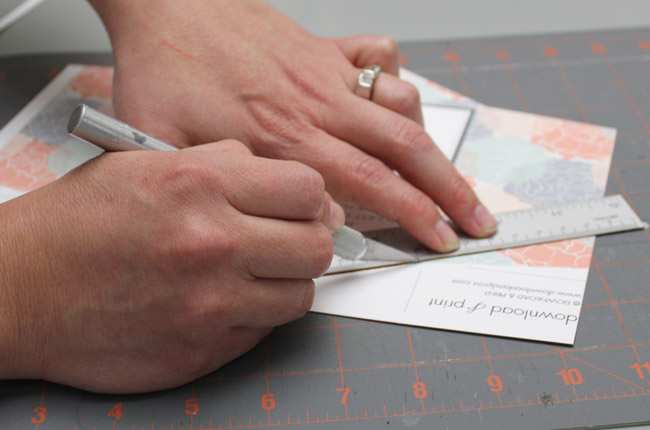
I like to cut around the pouchette using an X-acto knife and ruler, but you can also use scissors.
If using an X-acto knife and ruler cut from the inverted points to the outside (i.e. from the corners of the invitation to the outside of the paper). This will make for sharper corners and you won’t run the risk of overstepping the cut mark.
Fold in the pouchette flaps using the creases that you previously made. A bone folder will help you create sharp creases, or you can push on the fold firmly with the heel of your hand. The short flaps fold in first, followed by the medium flap, and the longest flap folds in last.
If you’d like to add a little sparkle to the invitation, trace the inner invitation border with a silver sharpie. The sharpie leaves a subtle sheen (Translation: Expensive metallic look!) to the pouchette.
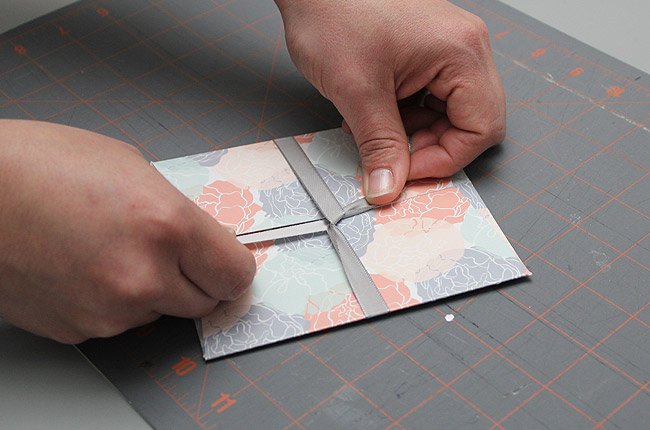
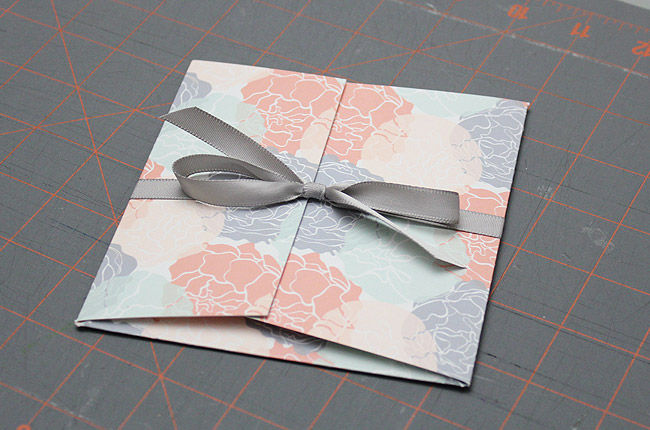
Tie a length of ribbon around the pouchette to keep it closed. Your invitations are now ready for stuffing into a 5.5” square envelope and mailing.
Hint: This entire process moves much quicker if you form an assembly line. Grab your maids, mom, and fiancé, your beverage of choice, and make an afternoon of it. Give each person a task. One person scores, one cuts, one folds, and one ties. I don’t recommend having your fiancé take the last step. In my experience, males just don’t tie pretty bows!
- Free printable templates {DOWNLOAD HERE}
- White card stock
- Printer
- Silver ribbon 7/8” wide, cut into approximately 18” lengths
- Bone Folder (optional)
- Scissors or X-acto knife and ruler (my preference)
- Silver sharpie (optional)
Step 1: Download and Print
Download the free Peachy Keen wedding invitation template files. Open the documents in MS Word and add your wedding details.
The fonts I used in the sample are London MM and Landliebe Script. You can download these fonts for free online, or use any fonts that you like. If you don’t have the sample fonts installed on your computer, Word will substitute different fonts.
Print the first side of the pouchette, flip the paper over and print the back side.
Hint: 90 lb paper is the ideal weight for this project. A paper too light runs the risk of having the printing show through the other side. Anything too heavy and your printer may have trouble, and creating the creases becomes more work.
Step 2: Score
Using your bone folder, score along the fold lines, just outside the invitation square. This starts the crease and preps the paper for the steps to come.
Hint: If you don’t have a scoring tool, a closed mechanical pencil or back of your X-actor knife will work.
Step 3: Cut
I like to cut around the pouchette using an X-acto knife and ruler, but you can also use scissors.
If using an X-acto knife and ruler cut from the inverted points to the outside (i.e. from the corners of the invitation to the outside of the paper). This will make for sharper corners and you won’t run the risk of overstepping the cut mark.
Step 4: Fold
Fold in the pouchette flaps using the creases that you previously made. A bone folder will help you create sharp creases, or you can push on the fold firmly with the heel of your hand. The short flaps fold in first, followed by the medium flap, and the longest flap folds in last.
Optional Step 5: Silver Embellishment
If you’d like to add a little sparkle to the invitation, trace the inner invitation border with a silver sharpie. The sharpie leaves a subtle sheen (Translation: Expensive metallic look!) to the pouchette.
Last Step: Seal and Mail
Tie a length of ribbon around the pouchette to keep it closed. Your invitations are now ready for stuffing into a 5.5” square envelope and mailing.
Hint: This entire process moves much quicker if you form an assembly line. Grab your maids, mom, and fiancé, your beverage of choice, and make an afternoon of it. Give each person a task. One person scores, one cuts, one folds, and one ties. I don’t recommend having your fiancé take the last step. In my experience, males just don’t tie pretty bows!
