


I can't even begin to say how thrilled I am to share today's post with you. I was recently asked to participate in the Say "I DO" with Xyron and Anna Griffin Blogger Design Challenge. After saying yes, 3 HUGE boxes arrived at my doorstep and were filled to the brim with crafting goodies galore from Xyron and Anna Griffi. Items included a Xyron Creative Station which makes it easy to laminate and create magnets and stickers, gorgeous card stock papers, paper punches, washi tape, water color & metallic markers, dimensional stickers, rubber stamps, and so much more. For this challenge I was asked to design a menu and place card using items that were sent to me. Since, so many amazing crafting supplies were sent to me, I knew I couldn't just stop with a menu and place card. So, I created an entire table setting complete with a menu that doubles as the centerpiece holder and a place card that doubles as a favor box. You can easily say I'm a BIG fan of items that serve a dual purpose :) Below are photos of my items along with step-by-step instructions so you can re-create these items for your own wedding or bridal shower. And, please don't forget to vote for my designs here. If I'm the lucky winner, one of my readers will win the very same AMAZING PACKAGE{s} OF CRAFTING GOODIES worth $1,000 just for themselves.
Vote for My Designs Here
To access the contest, click here, login to Facebook {if you aren't already} and click on the "Say I Do" contest page
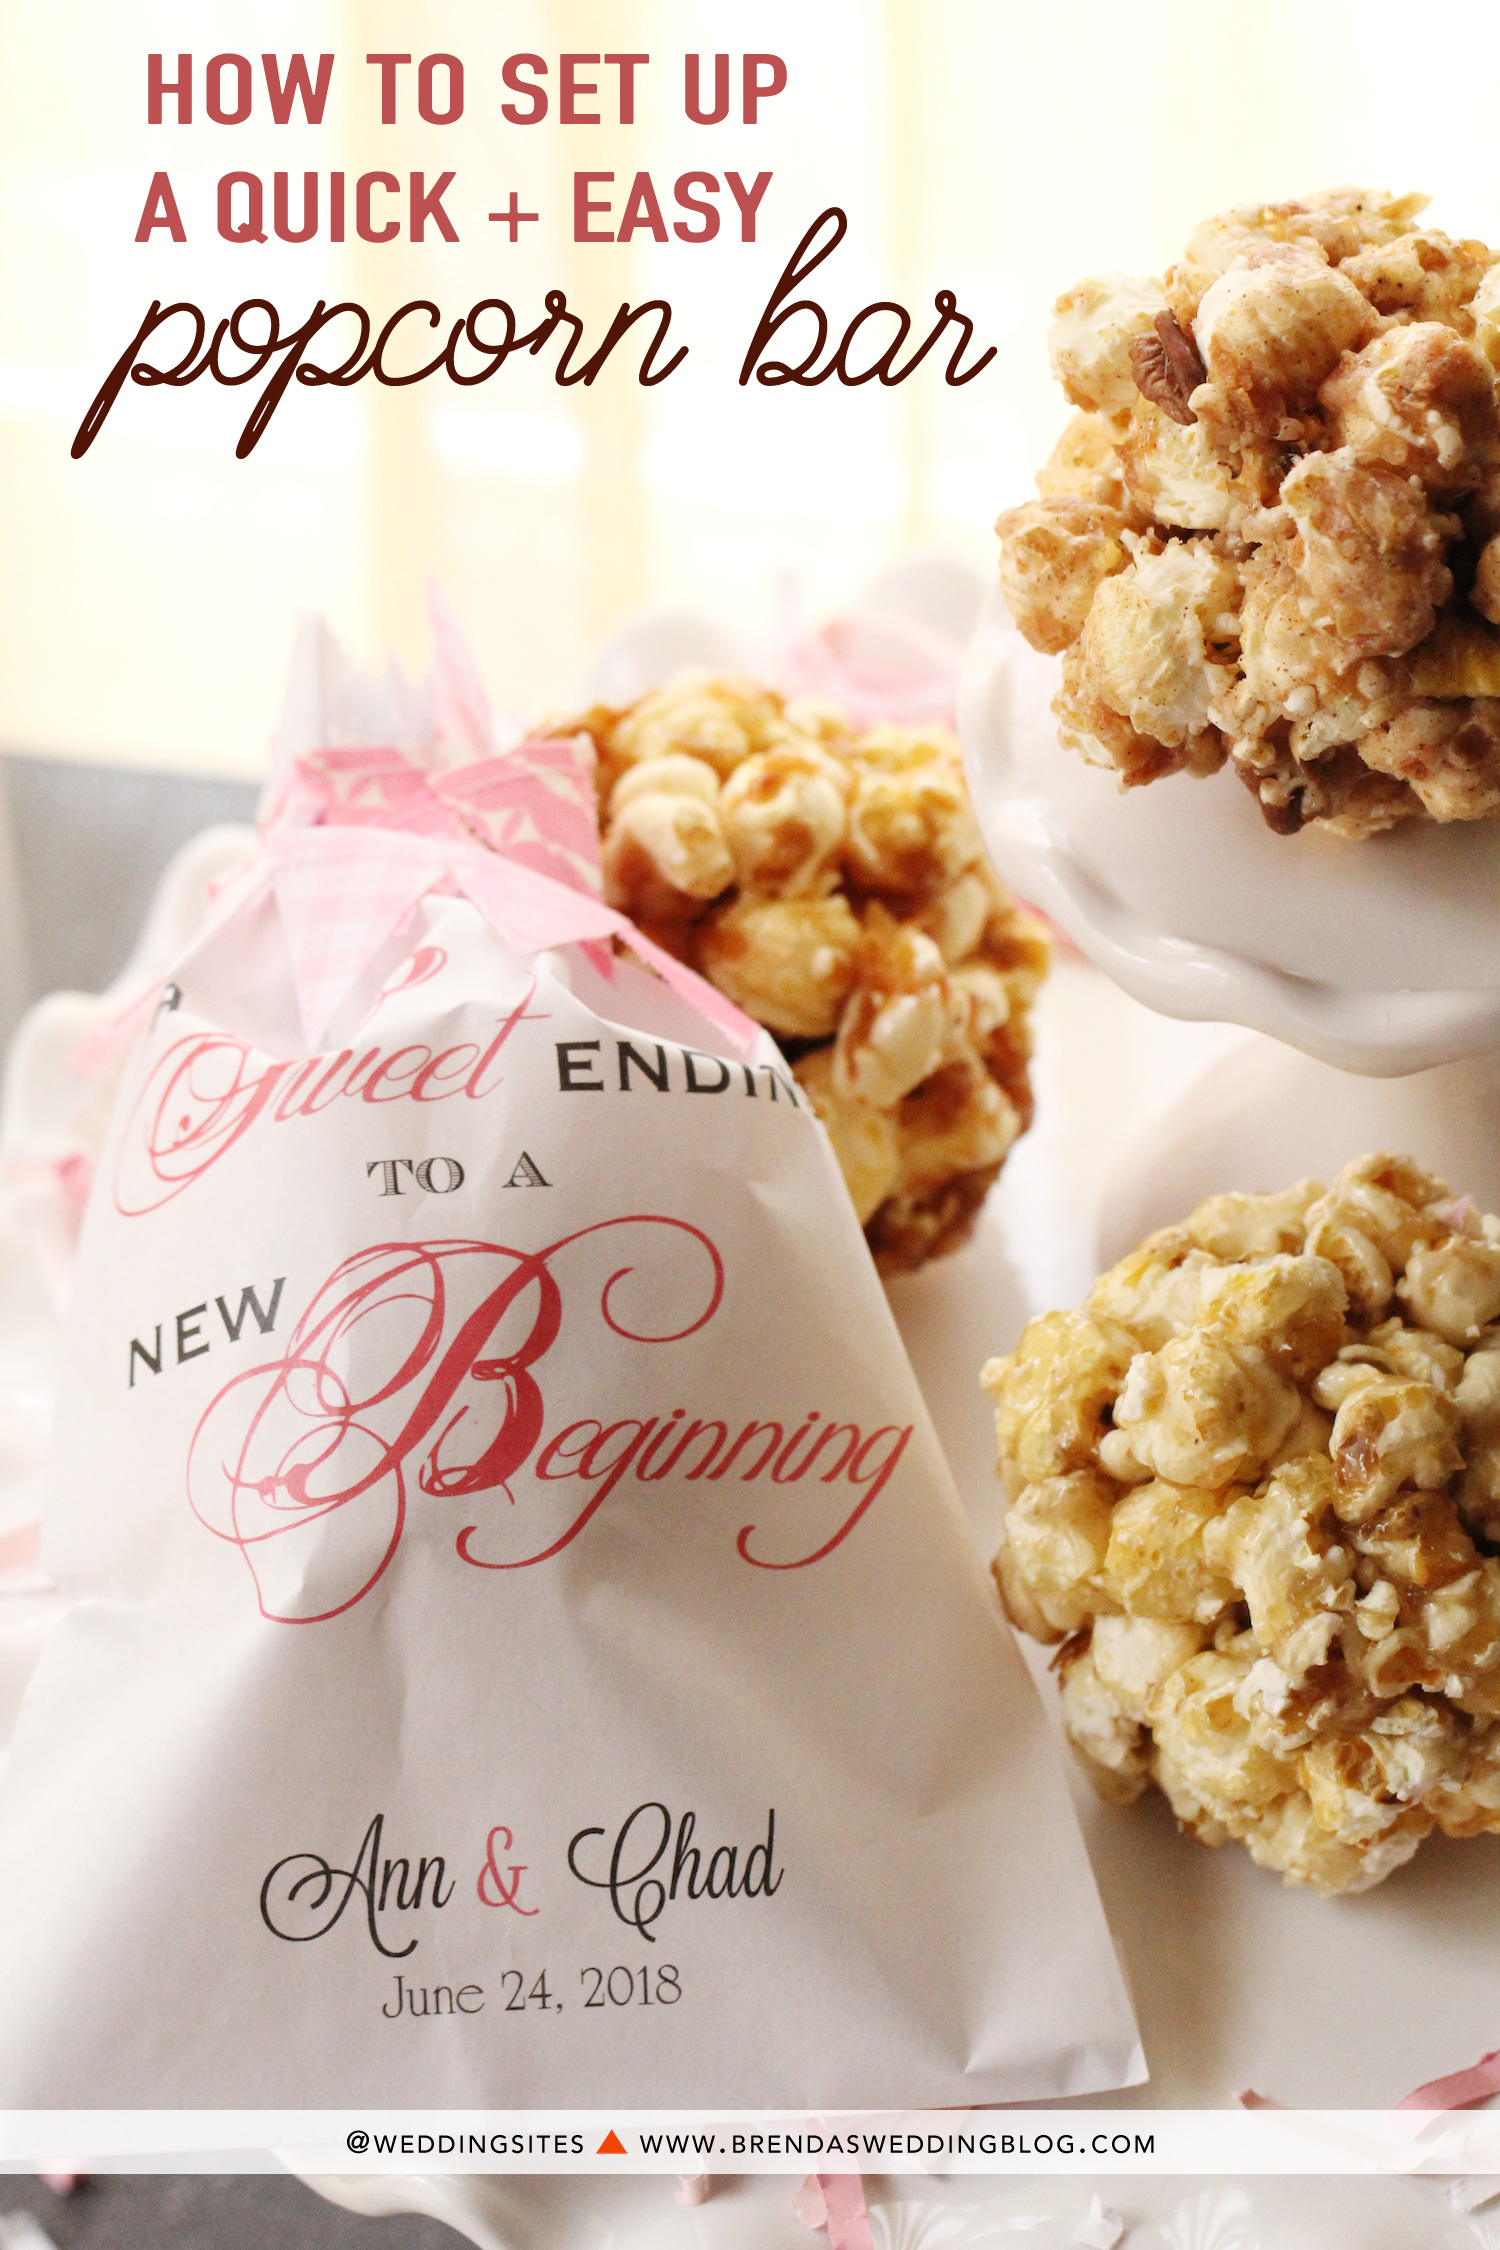
Step-by-Step Instructions for the Place Card and Favor Cake Box Combo
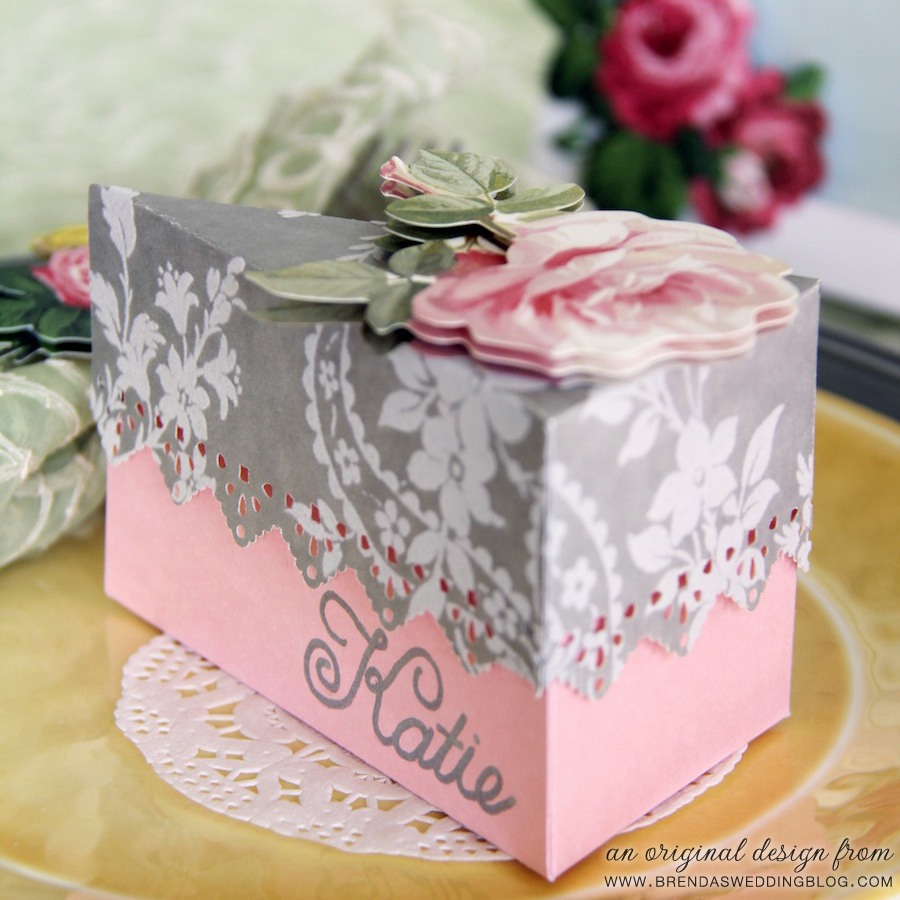
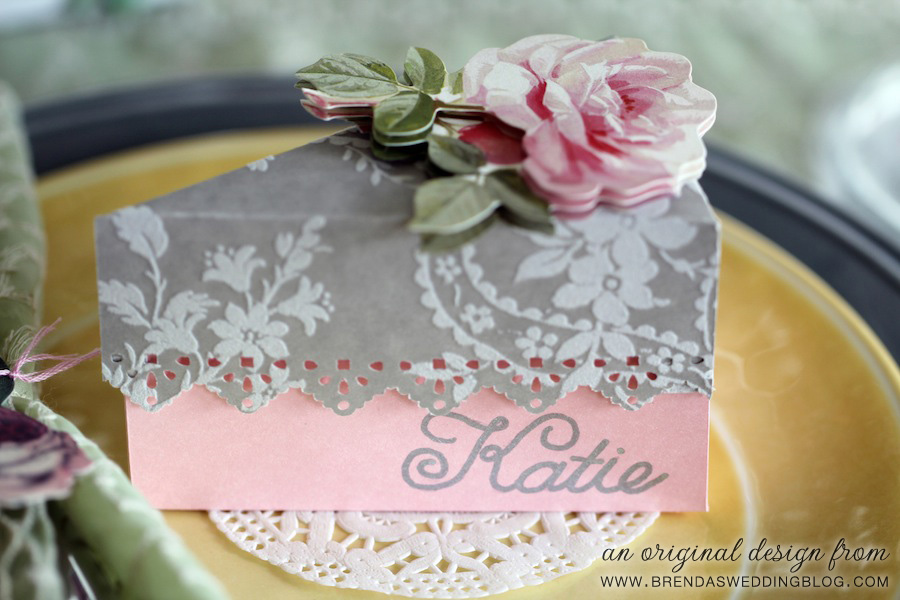
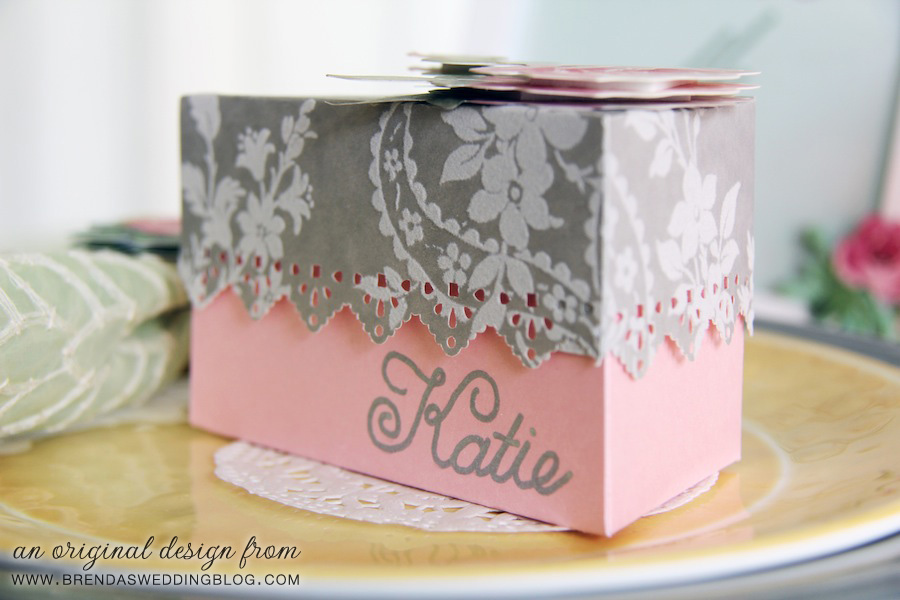
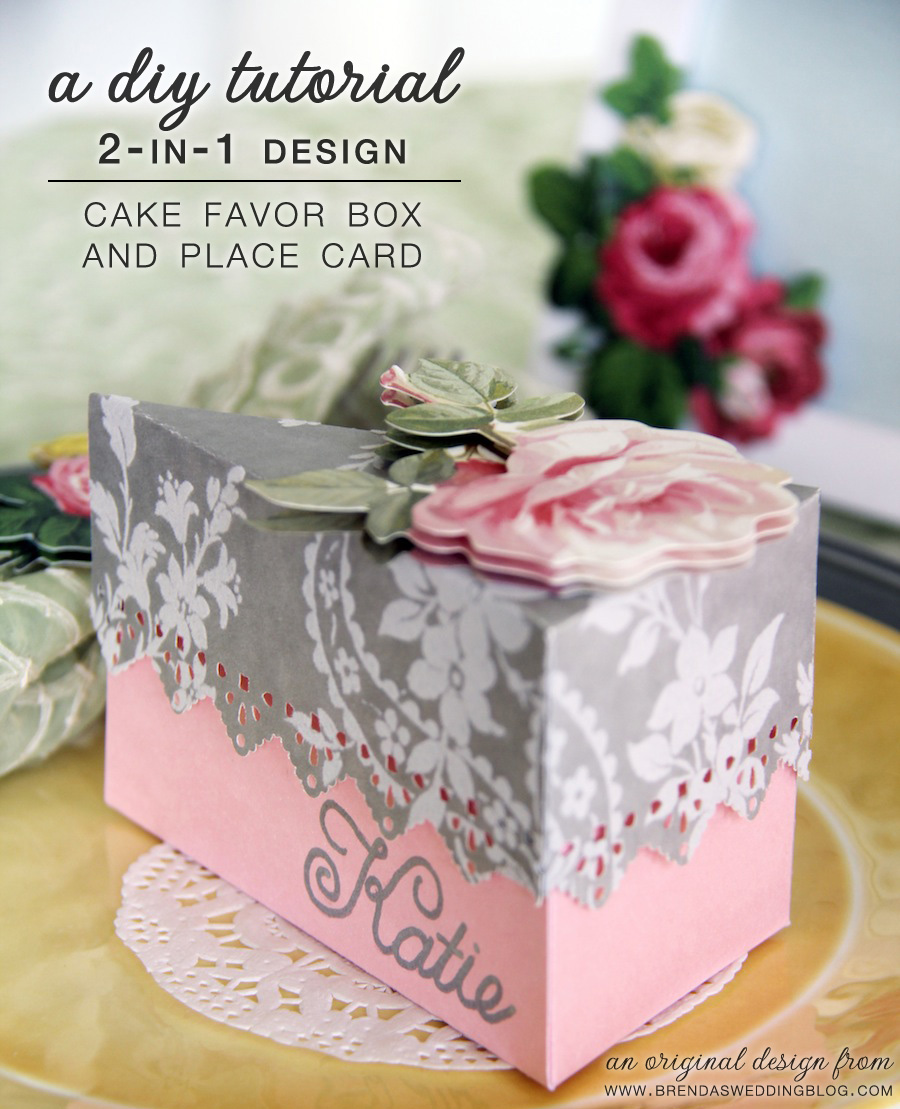
For my place card design I knew I wanted to do something totally unique and unexpected so I thought why not combine the favor box with the place card? And, instead of adding a tag or sticker - I wrote the name of the guest on the box itself. The color combinations and patterns for this box are endless which is something I love. You could keep the same color palette throughout, but change up the patterns to make each box unique if you wish. You can fill these sweet little cake boxes with anything - maybe little candies, a few small soaps if using them for a bridal shower, or even chocolates. If using food related items, I recommend lining the inside of the paper box with a little wax paper.
Supplies Needed:
Anna Griffin Flocked Paper
Anna Griffin Metallic Paper
Anna Griffin Dimensional Floral Stickers
Anna Griffin Border Punch
Xyron Creative Station with the permanent adhesive cartridge
Xyron Mega Runner
Paper Trimmer
X-acto Knife
Printer
Instructions:
1. Select two patterned card stock sheets of your choice sized to 8.5"x11" {may need to trim some of the 12x12 card stock to be 8.5x11}
2. Download the Cake Box Lid Template and Cake Box Bottom Template
3. Place the paper into your printer and print the template on the back side
4. Trim the paper with a straight edge and X-acto knife
5. On the dotted lines of the template, you will score for folding {I highly recommend a bone folder for this}
6. For the box lid, you will want to use the Anna Griffin Border Punch for the scalloped edges
7. Once trimmed, scored and scalloped, you will use the Xyron Mega Runner to run glue along the flaps that fold in on the box top and bottom
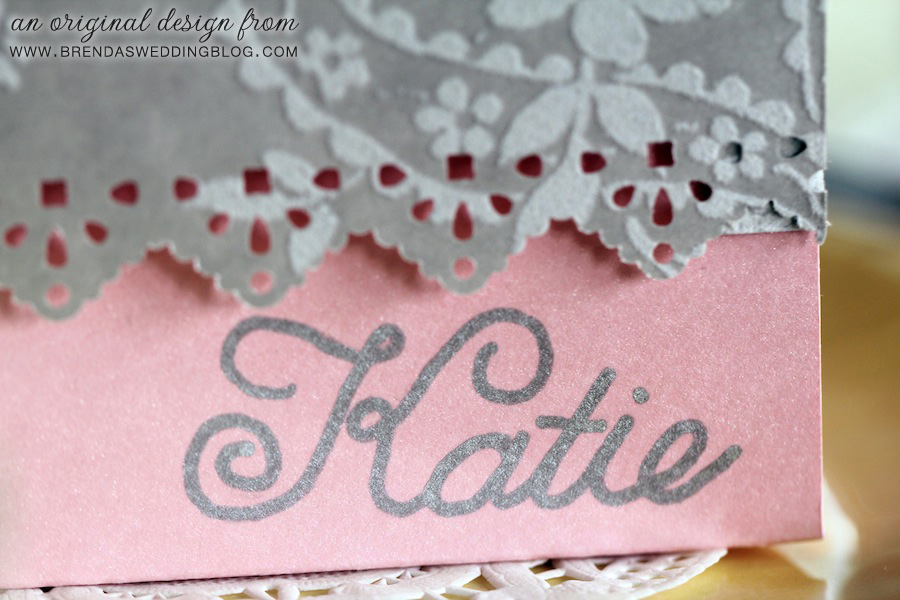
8. I used the Anna Griffin Silver Metallic Marker to write the name of the guest on the side of the box. To do this, I chose a font that was used in the menu {for me it was Melany Lane}, sized to fit in the space and printed it out. Simply trace the font onto the backside of the paper with a pencil, then flip over, align on the box and rub over the font with your pencil. Voila! You know have a light tracing of the name. Trace over with the Anna Griffin Metallic Marker.
9. Top the favor box/place card with an Anna Griffin Dimensional Sticker.


Step-by-Step Instructions for the Tri-Fold Menu that Serves as the Centerpiece Holder
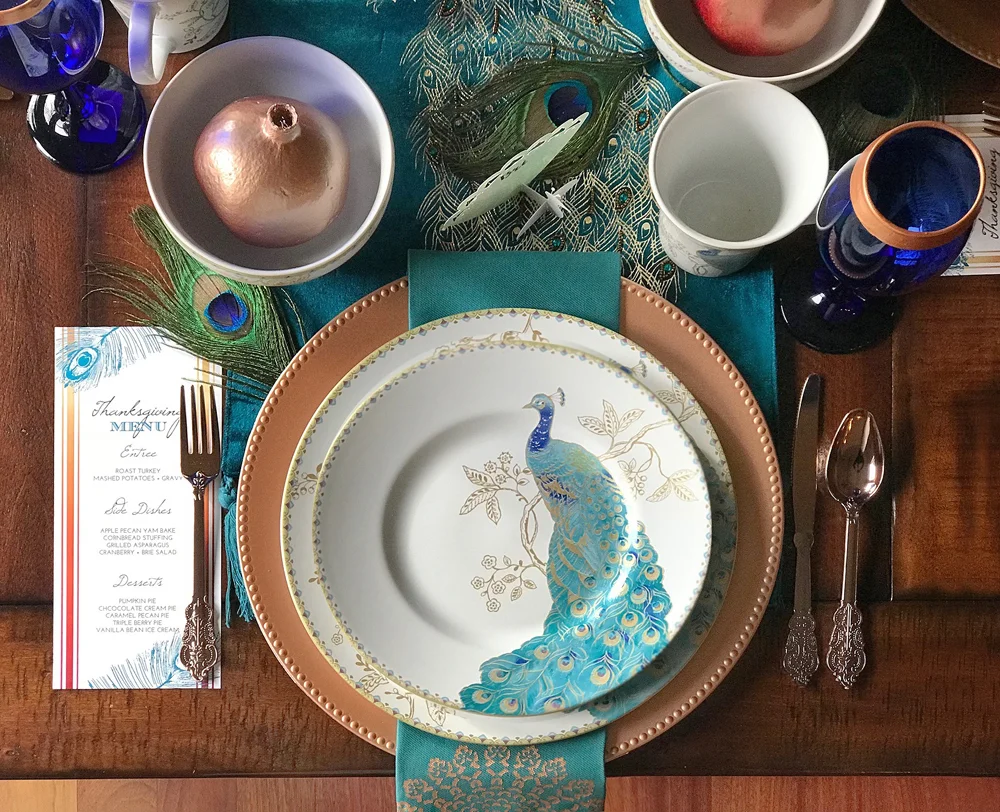
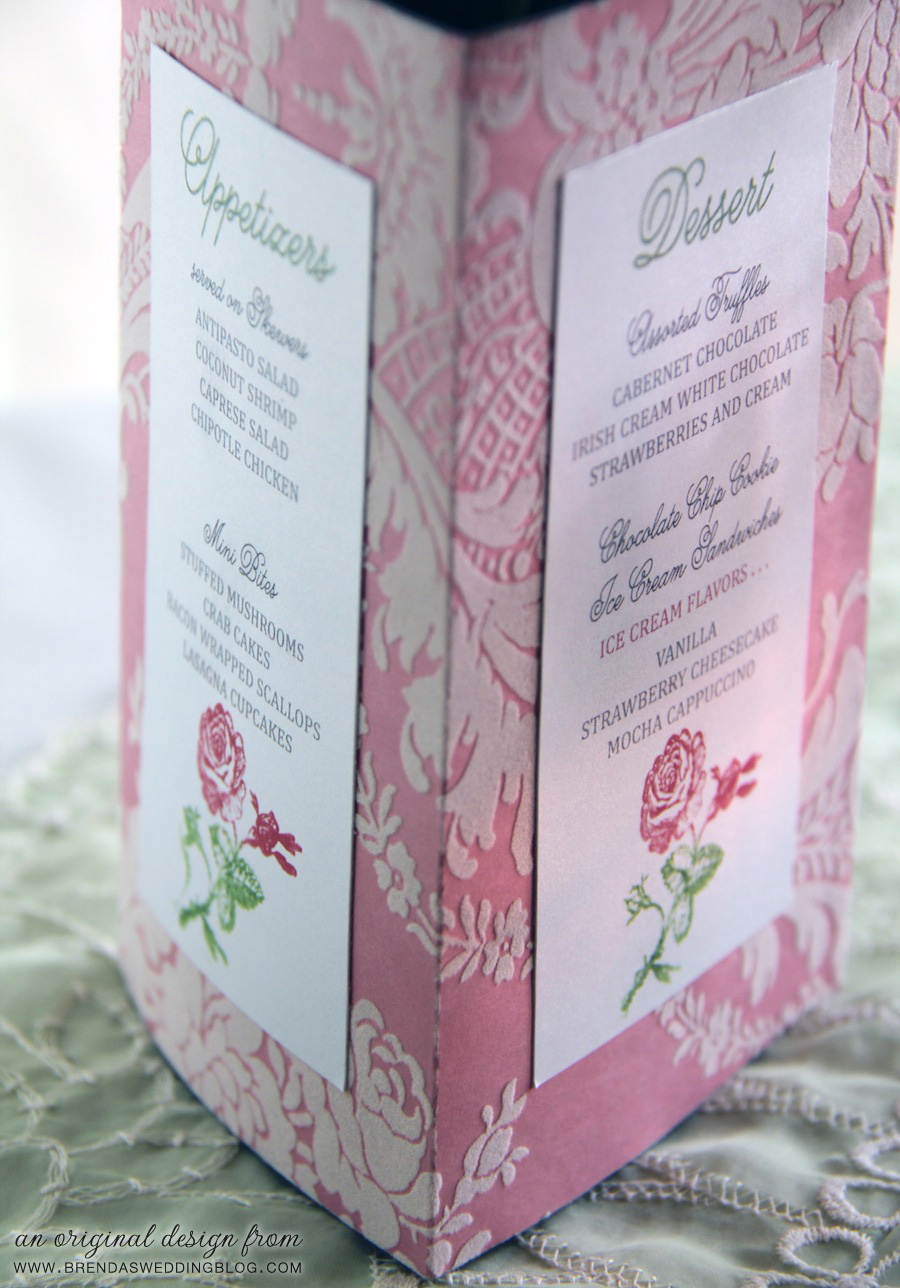
For my menu I thought it would be fun to turn it into a tri-fold so each side showed the menu for a particular food course - in this case ... appetizers, the main course and desserts. Then I slipped a narrow glass vase down inside that was filled with fresh roses and the centerpiece is functional and beautiful. Plus, the stems of the flowers are now hidden as well.
Supplies Needed:
Anna Griffin Flocked Paper
Anna Griffin Metallic Paper
Anna Griffin Floral Clear Stamps
Anna Griffin Ink Pads
Xyron Creative Station with the permanent adhesive cartridge
Xyron Mega Runner
Paper Trimmer
Printer
Instructions:
1. Select your 12x12 paper for the tri-fold menu and download and print this scoring guideline template {making sure it's on the backside of the textured paper}.
2. Once printed, simply take your bone folder and score along the guidelines.
3. Trim directly in half so you have two pages that are 6" in height and 12" wide.
4. For the menu, set up a file sized to 2.5" wide by 4.5" high in your favorite editing program.
5. Set up the menu with your favorite fonts and leave 1.5" at the bottom with empty space. {I used Melany Lane and Cambria}
6. Using the Anna Griffin clear rose stamp, place it on the ink pad so just the rose gets the color and stamp on the metallic paper. Be sure to leave it for a while to be sure it's dry.
7. Then stamp just the stem and leaves in the green ink pad and onto the paper
8. Once dried, run the three menu panels through the Xyron Creative Station using the permanent adhesive cartridge and simply center onto the panel of the tri-fold.
9. Once the menus are attached, simply run the Xyron Mega Runner over the flap that will hold the tri-fold menu together, seal the edge and you are finished.
Vote for My Designs Here
To access the contest, click here, login to Facebook {if you aren't already} and click on the "Say I Do" contest page
* No compensation was received for this post, I received the free products
to create these DIY projects for the Blogger Design Challenge.


